Setting up a Wired Network is easy to do if you know how it works. In previous posts, I showed how a Local Area Network (LAN) and how a Wide Area Network (WAN) works and what important part they play in a connection with the internet.
In this post, I will show how you install and configure a Wired Network.
How Wired Networks are Installed and Configured
If you want to set up a connection with a network, you need to have three basic items:
- A connected NIC: this is the physical hardware that connects your computer system to the network
- Properly configured IP addresses. All your devices in a network need to have the correct IP address. This can be done by using DHCP (Dynamic Host Configuration Protocol) or you can do this manually.
- You need to have a switch. A switch connects computers inside a wired network.
In case you want to share resources on your device with other users on the network, you also need to activate Microsoft’s File and Printer Sharing.
When you install a Network Interface Card, also called a Network Interface Controller or shortly “NIC”, Windows will install upon setup the TCP/IP protocol by default. Windows will also install the Client for Microsoft Networks, and the File and Printer Sharing for Microsoft Networks then. In case you use a macOS computer (Apple), the computer comes fully set up for networking.
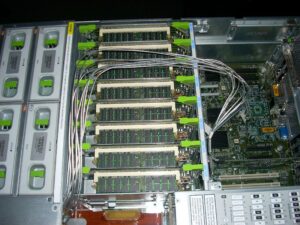
Installing a Network Interface Card (NIC)
The NIC is the link to the network and your computer system. Installing the NIC is the first step that is required to connect your computer to a network. In the past, this was not an easy job to install a NIC and set it up (I’m talking about the 1990s and before that), but nowadays every modern computer has a built-in Gigabit NIC. Windows will automatically install a driver for the NIC at installation so most people will not even be aware that this setup must be done first because the entire process is automated nowadays.
All modern NICs run in full-duplex mode. This means that they can send and receive data at the same time. Additionally, most NICs and switches use a feature that is called autosensing. This feature accommodates ancient devices that might attach to the network and are required to run in half-duplex mode. Half-duplex means that the device can send and receive, but not at the same time. If you need to adjust the duplex or the speed of the NIC manually, you can do that in the NICs properties. This can be done by opening the Network and Sharing Center in the Windows Control Panel. After that, you can then select Change adapter settings. In “Network Connections” you can then right-click on the NIC that you want to change and select “Properties.” Then you can click “Configure” to get to the NIC. After that, you click on the “Advanced” tab and scroll down in the “Property” section until you see “Speed & Duplex.” You can then adjust the “Value” on the right to match the ancient device that is giving you issues.

Link lights
When you look at your network card you see a type of LED (Light-Emitting Diode) flickering. This LED is a status indicator: it gives you information about the state of your NICs link to anything that is on the other end of the connection. Most people call them “Link Lights.”
A switch also has a link light. These lights give you the ability to check the connectivity at both ends of the cable. In addition to this, Multispeed devices normally also have a link light that indicates the speed of the connection. If the light is orange, the cable is plugged into a 10BaseT or a 100BaseT NIC.
A properly functioning link light is steady on when a NIC is connected to another device. A link light that is off or continuously flickering, shows a connection issue.
Another light is the activity light. This light turns on when your NIC detects network traffic. You see fragmentary flickering when it operates properly.
When you encounter a NIC, take some time to try to figure out what each LED means. It helps a lot in your diagnosis when there are issues. NICs have diverse ways of arranging and using their LEDs, but the functions are always the same:
- Link
- Activity
- Speed
Shortly summarized:
- Solid green = connectivity
- Flashing green = fragmented connectivity (indicates a properly functioning NIC)
- No green = no connectivity (the device is off or you have a connection issue)
- Amber light = collisions on the network (sometimes OK and sometimes not
- Link speed = LED on the right of the upper canister of the port
- Link Activity = LED on the left of the upper canister of the port
Always check the NIC LEDs first when you have connectivity issues.
Configuring your IP addresses
All operating systems are set up for DHCP (Dynamic Host Configuration Protocol). This Protocol automatically acquires an IP address setting. This is done for both IPv4 and IPv6.
In case you need to configure a static address, you can set this up easily as well. To do this follow the below steps:
- Press Windows + I key simultaneously to open the Settings app.
- Select Network & Internet from the sidebar on the left in Settings.

- Select Advanced network settings at the bottom of the Network & internet page.

- Find your network adapter in the list and select the adapter. Then, select View additional properties.

- Select Edit next to IP assignment.

- Choose Manual from the Edit IP settings dropdown menu. Then, toggle on the IPv4 option.

- Select the IP address field and type the static IP address to assign to your PC.

- Select the Subnet mask field and enter 255.255.255.0. Enter your router’s IP address, which is usually 192.168.1.1, in the Default gateway field.
- Enter 8.8.8.8 in the Preferred DNS field. Enter 8.8.4.4 in the Alternate DNS field.
- Select Save at the bottom.
Connecting to a Switch
A computer in a network needs to connect to a switch. A switch enables a connection to other computers on the network. Networks feature two types of switches:
Unmanaged switches
Unmanaged switches are smart, automated devices. If you plug a device into it, unmanaged switches will communicate by MAC (Media Access Control) addresses. No manual configuration is needed then.
Managed switches
A managed switch offers a lot of additional features that a modern network uses to provide extra security and efficiency. Managed switches have an IP address. This gives you the opportunity to configure the switch. With a managed switch you can adjust each port on the switch to any setting, enabling them to manage, configure and monitor the network in many ways. A managed switch also provides greater control over how data travels over the network and who can access that data.
Managed switches and VLANs
A fitting example of the power of managed switches is that you can set up Virtual Local Area Networks (VLANs). You can use special managed switches to break up or segment a single physical network into two or more distinct networks. Each VLAN you create can communicate with other computers within the same VLAN, but not with computers on another VLAN. The great part about this is that you can easily segment your network into different security layers with just one switch. If you have a network of 48 computers, connected to a 48-port switch, you will normally have all computers on the same network. With a VLAN-capable switch, you can access the management console and assign physical ports to different VLANs. For instance, you could assign ports 1 – 12 to VLAN100, 13-24 to VLAN200, 25-36 to VLAN300, and ports 36 – 48 to VLAN400.
An organization can benefit from the advantages of VLAN usage, including increased performance, more flexibility in network configuration and workgroup formation, and reduced administrative efforts. The biggest advantages of a VLAN:
VLANs are cost-effective
Because workstations on VLANs communicate with one another through VLAN switches and do not require routers unless they are sending exterior data (outside the VLAN). This enables the VLAN to oversee and expand data stacks, whereas switches have fewer capabilities than a router, and routers cause bottlenecks. VLANs do not need to forward data through a router to communicate with the devices that are inside your network. This decreases the overall network latency.
VLANs offer more flexibility than nonvirtual networking solutions
VLANs can be configured and assigned based on ports, protocols, or subnet criteria. Because of this, it is easy to alter VLANs and change network designs if this is required. You are also far more agile in cases when sudden changes must be made to the network. Because VLANs can be configured outside a physical connection to hardware or near other devices, you can allow groups to collaborate even if devices work on separate floors or in different buildings. This way you can transfer a great deal of data to other devices without requiring a router (and therefore accessing the internet).
VLANs reduce the work of network administrators
VLANs allow network administrators to automatically limit access to a specified group of users by dividing workstations into different isolated LAN segments. When users move their workstations, administrators do not have to reconfigure the complete network or change VLAN groups. This decreases the time that an administrator must devote to configuration and security measures.
How to put VLANs into practice
A lot of organizations have a WAN (Wide Area Network) because of multiple offices and large teams. VLANs are extremely useful then for network operations. Often, large companies work on cross-functional projects. Because of this, organizations need to be flexible in their network setup. VLANs are a tremendous help in this because they are easy to configure, and users can be easily redistributed with VLANs to different networks. This makes it possible to create temporary teams from different departments in the same VLAN to facilitate a high volume of data sharing without using the internet. This way marketing, sales, IT (Information Technology), and business analysts can work together to achieve high-stakes objectives most efficiently. Network segmentation with VLAN facilitates flexible teamwork and increases security because of this.
VLANs can have complications, especially in big and dynamic organizations. This can cause VLAN mismatches. A VLAN mismatch happens when two connected switch ports have different VLAN configurations. For example, if switch 1 on port 1 is configured for VLAN100 and is allowed on all VLANs (for instance VLAN100, VLAN200, VLAN300, and VLAN400), is connected to switch 2 on port 48 that is configured for native VLAN100 but is only allowed on VLAN100 and VLAN200 you have a mismatch and a failed connection. Because of this, it is very important to clearly document everything when setting up your VLANs and to pay very close attention, preferably with a colleague that does a double-check.
As an alternative, you can hire Managed Service Providers (MSPs: third-party companies that can remotely manage a customer’s IT and end-user system) to prevent these issues. MSPs can configure a VLAN properly and they can leverage their knowledge and powerful network segmentation benefits to make their clients’ networks faster and more secure while giving them physical flexibility. As all networks evolve over time, MSPs who know how to conduct VLAN maintenance and check device distribution can increase and sustain network performance.
Final Thoughts
Networks can become extremely complicated and sensitive to security breaches when you do not exactly know how they work and/or when the network has a lot of devices that must be managed. The best remedy to prevent issues is to have an admin or an MSP (Managed Service Provider) that creates a well-established network with great VLAN functionality in which network architecture is documented properly and adjusted in case of any changes.
Feel free to contact me if you have any questions or if you have any additional advice/tips about this subject. If you want to keep in the loop if I upload a new post, do not forget to subscribe to receive a notification by email.