In my previous post about computer memory, I was mainly focusing on the mechanics and the types of memory. Additionally, there are a lot of other memory-related subjects that indirectly connect with RAM. In this post, I will get into more details.
RAM upgrades
If your older system is having performance issues the first thing you should do is to check if you should add more memory to your computer. Software/applications are getting more and more sophisticated over time and this also means that they need more memory. Most of the time adding RAM to your computer resolves the lagging of your computer system. It sounds easy to plug in some extra RAM but if you don’t do it properly, it can do serious damage to your system.
When you need to wait a long time to load a problem and when a program runs slow, there is a very big chance that a lack of RAM is the root cause of the problem. Another sign that you lack RAM is that your hard drive is working very hard when you move between program points. To be absolutely sure if you lack memory, check on your current memory and do a benchmark: search on Google what kind of memory your programs require(especially your Operating System). After that press windows-pause/break to check your RAM. You can also run a Performance check in the Task Manager. This is a really handy tool that can be accessed by CTRL-SHIFT-ESC. When you select the Performance tab you can see your memory. Use this while you are running all the programs that you want to use:

In case your memory used is completely on top you can be pretty sure that it really is a lack of RAM memory that creates your performance issue.
Selecting the proper RAM DIMM
The next step you take then would be to select the proper RAM DIMM (memory card), suitable for your computer. Not every type of RAM is compatible with your computer and selecting the wrong one might end up in a return trip to the computer store/sending back your ordered package.
First, open your computer case and check how many RAM sticks you have and how many free slots are available. After that, you should check the motherboard book or go to the RAM manufacturer’s Web site to check the total capacity of RAM that your system can handle and what kind of technology is compatible with your system. For instance, you can’t put DDR4 RAM into a DDR3 system: the system won’t be able to handle that. Another helpful tool is CPU-Z (freeware) which can tell you the total number of slots on your motherboard, the number of slots used, and the type of RAM in each slot. This saves time and this way you don’t have to open your computer.
Now the next step is to make sure to create max stability in your system when you add extra RAM. To do so, choose RAM sticks that match in technology, capacity, speed, and latency (CL).
Really pay attention not to mix up speed. If you mix DRAM speeds it can end up in a system locking up every few seconds or every few minutes. Always shoot for RAM that is equal to or faster than the motherboard specifies. Slower will result, like previously said, in performance issues. If you put it in much quicker RAM though, it won’t make your system quicker.
In case the speed of DRAM in one bank is different than the other, don’t worry. It will work as long as all the speeds are as fast or faster than the required speed, specified by the motherboard. However, don’t try to put different speed DRAM sticks in the same bank with a motherboard that uses dual-channel DDR: that won’t work.
Installing RAM
Once you have the correct RAM, it is time to install it on your computer. Do this carefully and prevent damaging your system by being really careful. I would first attach an anti-static wrist strap or touch some bare metal on the power supply of the computer to ground yourself. This way you avoid Electrostatic Discharge (ESD). After that swing the side tab on your RAM slots down from the upright position. Then pick up the RAM stick but don’t touch the contacts in order to prevent damaging them. Line up the notch or notches with the raised portion(s) of the DIMM socket. Then give the DIMM a hard push down. Normally this is sufficient. Make sure that the DIMM snaps into position so it shows that it is completely seated.

Your computer’s motherboard should be able to detect and automatically set up any DIMM that you install on the condition that it is the right RAM for your system. The reason why the motherboard can detect RAM so easily is that the modern RAM sticks have a chip using a technology named “Serial Presence Detect” (SPD). This makes life a lot easier than in the “dark ages” when we were plugging in 16MB sticks in our computers and had to set it up ourselves. All new systems count on SPD to set up the RAM timings properly for your system when it boots. If you add a RAM stick with a bad SPD chip, you will get a POST error message and your system will not boot. Unfortunately, if this chip is broken, you can’t fix it. You need to get back to the shop again to buy a new stick of RAM.
Installing RAM into a laptop is as easy as installing RAM into a computer. All modern laptops give you easy access to their SO-DIMMs. You can slide the panel off a laptop most of the time to immediately see the SO-DIMMs. After that, slide the pins into position and snap the SO-DIMM down into the retaining clips.

Dealing with RAM errors
Many errors can pop up on your system and some might be related to RAM issues. System lockups and page faults in Windows (most of the time they go hand in hand) can indicate that there is a problem with RAM. Some page faults might look like RAM issues because error messages with long hexadecimal digits are shown, but because the error message contains a memory address it doesn’t necessarily mean that there is an issue with RAM. The first thing you should do is write down the address and if it repeats in later error messages as well, you know that you probably have a bad RAM stick.
Sometimes the “panic button” completely shuts down a PC. This button is called a “non-maskable interrupt” (NMI). It is an interruption that can’t be ignored by the CPU. An NMI manifests in Windows as the “Blue Screen of Death” (BSoD). I think most of you had this at least once during your time working on a computer (I did and even a few times more). A macOS machine displays a “Spinning Pinwheel of Death” (SPoD) or the Pin Wheel of Death which is similar to the Windows BSoD. But mostly a macOS will simply reboot instead. Bad RAM can trigger an NMI sometimes but more often the problem is with buggy programming or a clashing code.
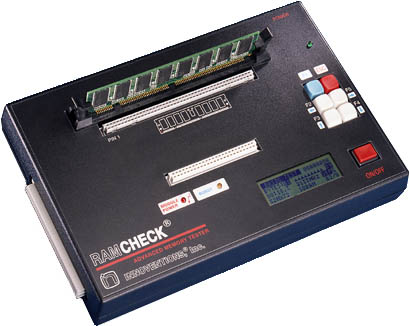
Memory errors can have a variety of sources like buggy applications, buggy hardware, a dying power supply, electrical interference, etc. The first thing you should do is to check the power supply first. After you have diagnosed that it really is a RAM problem you are facing there are a few things you can do. The first thing you can do is to get a RAM-testing device that can analyze your DIMM:
If you use a different Operating System (OS), you can also use the open-source (free) Memtest86+ on memtest.org. It checks your RAM and reports bad RAM when it finds it.
However, I prefer to go for the second option myself: replace your RAMM with a spare RAMM DIMM you know is working and see if it solves the problem.
Virtual Memory
I think most people know the term “Virtual Memory” but what is it exactly? I had no clue myself so time I took some time to get into the books and learn a bit more about Virtual Memory.
A computer uses a part of the hard drive or the Solid State Drive (SSD) as an extension of RAM. This is called “virtual memory”. If your computer runs out of RAM, the system automatically swaps less-used programs from RAM and moves them to the “page file” (in case you use Windows). This way it creates more space for the programs you are using at that moment. The page file name is pagefile.sys. The page file is hidden in your system.
It takes time to swap programs between RAM and the page file. You can’t see that a swap is taking place but you can notice it because your computer slows down when Windows is swapping between RAM and the page file. In case Windows needs to access the page file a lot, you will see the hard drive access LED going crazy. When this happens often (which is called disk thrashing) it is also a good indication that you need to add more RAM to your system.
In addition to virtual memory, Windows also offers another feature to increase memory performance: ReadyBoost. This feature enables you to use flash media devices, memory cards, and USB thumb drivers as extra virtual memory. The performance increase when only using a hard drive for virtual memory can be big because read/write access times on flash memory reduces hard drive read/write access times.
In order to get ReadyBoost running, just plug a ReadyBoost-approved device into a USB port or built-in flash memory card reader slot. Right-click on that device on your computer and select “Properties”. After that, click the ReadyBoost tab and select the middle option: “dedicate this device to ReadyBoost. Now click on “apply” and you are good to go.
However, when running SSD you won’t have much benefit with ReadyBoost. If you are doubting between ReadyBoost or more RAM, always go for more RAM.
OS memory recommendations
Microsoft recommends a minimum system requirement of 1GB of RAM for 32-bit versions of Windows and 2 GB of RAM for 64-bit versions but a lot of field experts recommend at least 2GB for 32-bit versions for decent performance and 4GB for the best performance. For 64-bit versions, they recommend 4GB for decent performance, 8GB for solid performance, and 16+ when you need to do a lot of processor-intensive work.
Apple recommends a minimum of 2GB of RAM for macOS but also here, the field experts have a different opinion. The 64-bit only OS needs a minimum of 4GB and 8GB for good performance. If you want a peak performance you should go for even more (for instance 16GB).
I would follow blindly the field experts because they work with these systems in the field and have practical experience with all kinds of different programs.
Nowadays, a lot of devices (like phones and tablets) come with sealed systems. This means you can’t open them and replace RAM manually. These systems also run on an Operating System that receives updates all the time so never be cheap on RAM when your intention is an investment in a device that you want to use for quite a while.
Final Thoughts
This wraps up RAM. I hope this post and the previous post help you in understanding how memory works in general and RAM specifically, how you install RAM that works with your system, and how to detect a bad RAM card and replace it.
Feel free to contact me if you have any questions or if you have any additional advice/tips about this Memory and RAM. If you want to keep in the loop when I upload a new post, don’t forget to subscribe to receive a notification by e-mail.